Tuesday, November 18, 2014

Soy-free chickpea tofu (Shan Tofu, Burmese Tofu)

Yesterday I celebrated a premiere. It was the first time for me to make chickpea tofu. This tofu is also known as Shan Tofu or Burmese Tofu and is a traditional dish from Burma. In Burma they typically cut the chickpea tofu in equal cubes and fry the cubes in oil. Or they just it the tofu in a soup or cook the sliced tofu in a Burmese curry.
The chickpea tofu doesn’t look or taste like normal tofu but you can use it  the same way. For people who are allergic to soy, who don’t like soy or just want to reduce their soy consumption this tofu is a real enrichment.
 
Pan fried chickpea tofu
Recipe for one cake pan (26 cm x 16 cm x 2 cm)
150 g chickpea flour
900 ml water
½ tsp. Salt
neutral oil

Place the chickpea flour into a big bowl. Then slowly stir in half of the water and whisk until smooth.
Grease a baking dish (26 cm x 16 cm) with oil.
Now bring the remaining water to a boil in a shallow pot. Turn heat to medium high and carefully pour in the chickpea mixture into the simmering water. Stirring continuously until the mixture has thickened and is glossy, about 8 minutes.
Pour immediately into the prepared baking dish and let completely cool. The longer it sits, the more water will drain out and the firmer the tofu will get.
When the tofu is ready to consume you can cut it into cubes and fry in a non-stick pan with a little oil.

Chickpea tofu ready to use
By the heat the tofu will get soft. After frying just let it cool briefly and the tofu will become firmer again. Now you can dip the tofu cubes into soy sauce, eat them with fried vegetables, adding them to a soup or mix under a cooked curry. You also can eat the tofu cold (without frying before) in a salad or in a sandwich.
If you like your tofu in various flavors season the chickpea mixture before cooking. For example with garlic, bell pepper, basil, curry,…


I highly recommend you to experiment with the tofu so that you get an idea how multifarious it is! 

Love Ida - and never forget cooking is our passion! 

Saturday, November 15, 2014

Raw falafel stuffed in a beet root wrap with lucuma carrot hummus, hot tomato salsa and sliced vegetables


Raw falafel? Is that possible? Yes everything is possible;-)! Just try it out!

Recipe for six wraps

For the falafel
125 g chickpeas (dried)
15 g flat parsley
1 tsp. salt
1 tsp. ground cumin
½ tsp. ground coriander seeds
½ red onion
1 garlic clove
10 g black sesame
10 g white sesame
 
For the beet root wraps
180 g beet root (chopped and peeled)
70 g flax meal
150 ml water
2 pinches ground cumin
1 tsp. sesame
1 pinch powdered paprika
1 pinch ground allspice (pimento)

For  the carrot lucuma hummus
100 g carrots (chopped and peeled)
125 g chickpeas (dried)
50 g white sesame
1 tsp. lucuma
1 tbsp. lemon juice
2 tbsp. water
1 tbsp. olive oil
salt to taste

For the hot tomato salsa
2 big tomatoes
2 bell peppers (or as you like)
5 g flat parsley
salt to taste

Furthermore:
vegetables you like for filling (e.g. red cabbage, carrot, salad, tomato, onion, cucumber)


For the falafel and hummus soak the chickpeas in cold water over night. Rinse and drain thoroughly. Then leave your chickpeas at room temperature for three days and rinse and drain them two or three times a day.
After three days start with the beet root tortillas. For this blend all tortilla ingredients in your high-speed blender until it’s very smooth. Now spread the tortilla batter onto two Teflex-lined dehydrator sheets. Dehydrate at 45° degrees Celsius for about 5 hours or until the tops are firm and you can peel them away from the sheets. Now flip the wraps on the other side and dehydrate until dry but still pliable.
Meanwhile place two thirds of the sprouted chickpeas with the salt, the cumin powder, the coriander powder and half of the flat parsley in your food processor and process until you get a thick paste with a granular structure. Chop the onion, the remaining parsley and the garlic clove finely and mix them under the falafel mixture. Now place the black and white sesame seeds on a big plate. With wet hands form little balls which you then turn in the sesame seeds. Place the finished falafel balls on a large dish until ready to use.
Go ahead with the hummus. For this place the remaining chickpeas with all other ingredients in your high-speed blender and blend until smooth. Fill the hummus in a small bowl and taste it with salt.
Now wash the tomatoes and cut out the stalk. Chop the tomatoes, the flat parsley and the bell peppers finely. Fill the hot tomato salsa also in a small bowl and taste with salt.
Afterwards slice the vegetables finely.
When everything is ready, cut the tortillas in 6 equal rectangles and stuff them with the falafel, the hummus, the tomato salsa and the sliced vegetables.


Did I convince you?


Love Ida – and never forget cooking is our passion!

Friday, November 14, 2014

Raw inspired baklavas with vanilla sauce


Baklava – everybody knows them, everybody loves them! After an oriental meal a piece of baklava is as indispensable as a Turkish coffee. But such a tiny piece is out of the usual. The individual phyllo sheets have to be coated with liquid fat and than layered with chopped nuts. After baking they are being soaked with sugar syrup. No wonder that you seem to have undergone a sugar shock after eating a piece. All the same they never stop being a delicious temptation. Therefore I believe it’s worth while imitating these sugary baklavas with a healthy but also sweet variation. That’s how these tasty raw jewels came about.


Recipe for 9 pieces
 
For the “phyllo dough”
2 big apples

For the filing
5,3 oz. (150 g) walnuts
2,8 oz. (80 g) dates
2 tbsp. agave nectar
1 pinch ground cinnamon
1 pinch ground cardamom
1 pinch ground cloves

For the vanilla sauce
1,4 oz. (40 g) cashew butter
4 tbsp. water
1 tbsp. agave nectar
pulp of one vanilla pod

Furthermore:
0,7 oz. (20 g) chopped pistachios


The day before slice the apples thinly with a mandolin or a sharp knife. Dry the apple slices in a dehydrator until they are crisp. Than store them in a hermetic container over night.
The next day throw all the filling ingredients into the food processer and process until you end up with a sticky mixture. Now cover the base of the cake form (or a square shape) with cling film. Take a third of the apple chips and place them closely positioned on top of the cling film. Thereafter cover the apple chips with half of the amount of the nut filling. Go on with a second third of the apple chips and place them closely positioned on the nut filling. Now take the rest of the nut filling to cover the apple chips again. End the baklava cake with the remaining apple chips. Now press the baklava cautiously down so that it sticks together.
Cut the baklava cake with a sharp knife into nine pieces and garnish with the chopped pistachios.
For the vanilla sauce mix the cashew butter with water, agave nectar and the vanilla pulp until you get a smooth texture.
Serve the baklavas with the vanilla sauce.
 
Raw Baklava with vanilla sauce
 
Love Ida - and never forget cooking is our passion!


Thursday, November 13, 2014

Raw wedding cake - with pistachios, vanilla bean and black berries


Can you believe, that this wonderful and mouth-watering wedding cake is raw? I think, this is the most healthiest wedding cake you ever saw!  Of course you don’t have to marry to create this cake. Maybe you have an other event or you just want to treat yourself. So go ahead and try it out, it’s easier than you imagine.


For three cake pans (1x 26 cm Ø, 1x 16 cm Ø, 1x 10 cm Ø)

For the pistachio crust
9,7 oz. (275 g) almonds
9,7 oz. (275 g) dates (pitted)
2,6 oz. (75 g) pistachios (peeled)
 
For the vanilla filling
26,6 oz. (755 g) cashew nuts
32,5 oz. (920 g) pears (peeled and chopped)
4,6 oz. (130 g) virgin coconut oil (Lifefood)
4 tbsp. lemon juice
2,3 oz. (65 g) agave nectar
pulp of one vanilla pod

For the berry mousse
6 avocados (soft)
5 bananas (medium size)
15,9 oz. (450 g) black berrys
2,8 oz. (80 g) flax meal
3,5 oz. (100 g) dates (pitted)
1,8 oz. (50 g) virgin coconut oil (Lifefood)
2,1 oz. (60 g) agave nectar
5 tbsp lemon juice
 
For the vanilla butter cream
9,9 oz. (280 g) cashew nuts
3,2 oz. (90 g) virgin coconut oil (Lifefood)
1,9 oz. (55 g) agave nectar
130 ml water
pulp of 1/2 vanilla pulp

Furthermore
1,2 oz. (35 g) pistachios (peeled)
4,4 oz. (125 g) black berries


For the crusts throw all the crust ingredients into the food processor and process until you end up with a sticky dough. Cover the bases of the cake pans with a baking sheet and lightly grease the rings with some coconut oil. Evenly press down the pistachio date mixture into the three cake rings in relation to their sizes.
For the vanilla filling blend the cashew nuts together with the chopped pears, the agave nectar, the lemon juice and the vanilla pulp in your high-speed blender. Melt the coconut oil and add it to the mixture as well. Blend everything once more.(For this I use my Vitamix, - it’s rather expensive, but it ensures a really perfect texture for the filling). Now pour the filling evenly and equally on top of the three crusts and batter them smoothly. Place the cakes in the fridge for about two hours.
For the berry mousse peel the bananas and the avocados and remove the stones from the avocados. Blend the avocado and banana flesh with the remaining berry mousse ingredients in your high-speed blender until you get a smooth mixture. Place the berry mousse evenly and equally on top of the vanilla filling of the chilled cakes. Batter them smoothly before you place them into the freezer for about four hours.
In the mean time blend all the ingredients for the vanilla butter cream smoothly.
After four hours take the cakes out of the freezer and remove the rings  cautiously from the cake pans. Cover the cakes with the vanilla butter cream. Now place them back into the freezer (one hour) and let the cream become firm.
Meanwhile chop the pistachios roughly. Wash and dry the black berries and cut them in half lengthways.
Now cautiously remove the parchment papers and the bases of the cake pans from all three cakes. Place the largest cake on a big plate or cake stand. Now stack the middle cake on top of the large (in center) and the small on top of the middle cake (in center).
Decorate the outer edges of the cakes with the chopped pistachios. The black berry halves you have to place along the inner rings.
Consume the wedding cake within two hours after decoration or place it back into the freezer. Take it out of the freezer half an hour before eating.


Love Ida – and never forget cooking is our passion!

Thursday, November 6, 2014

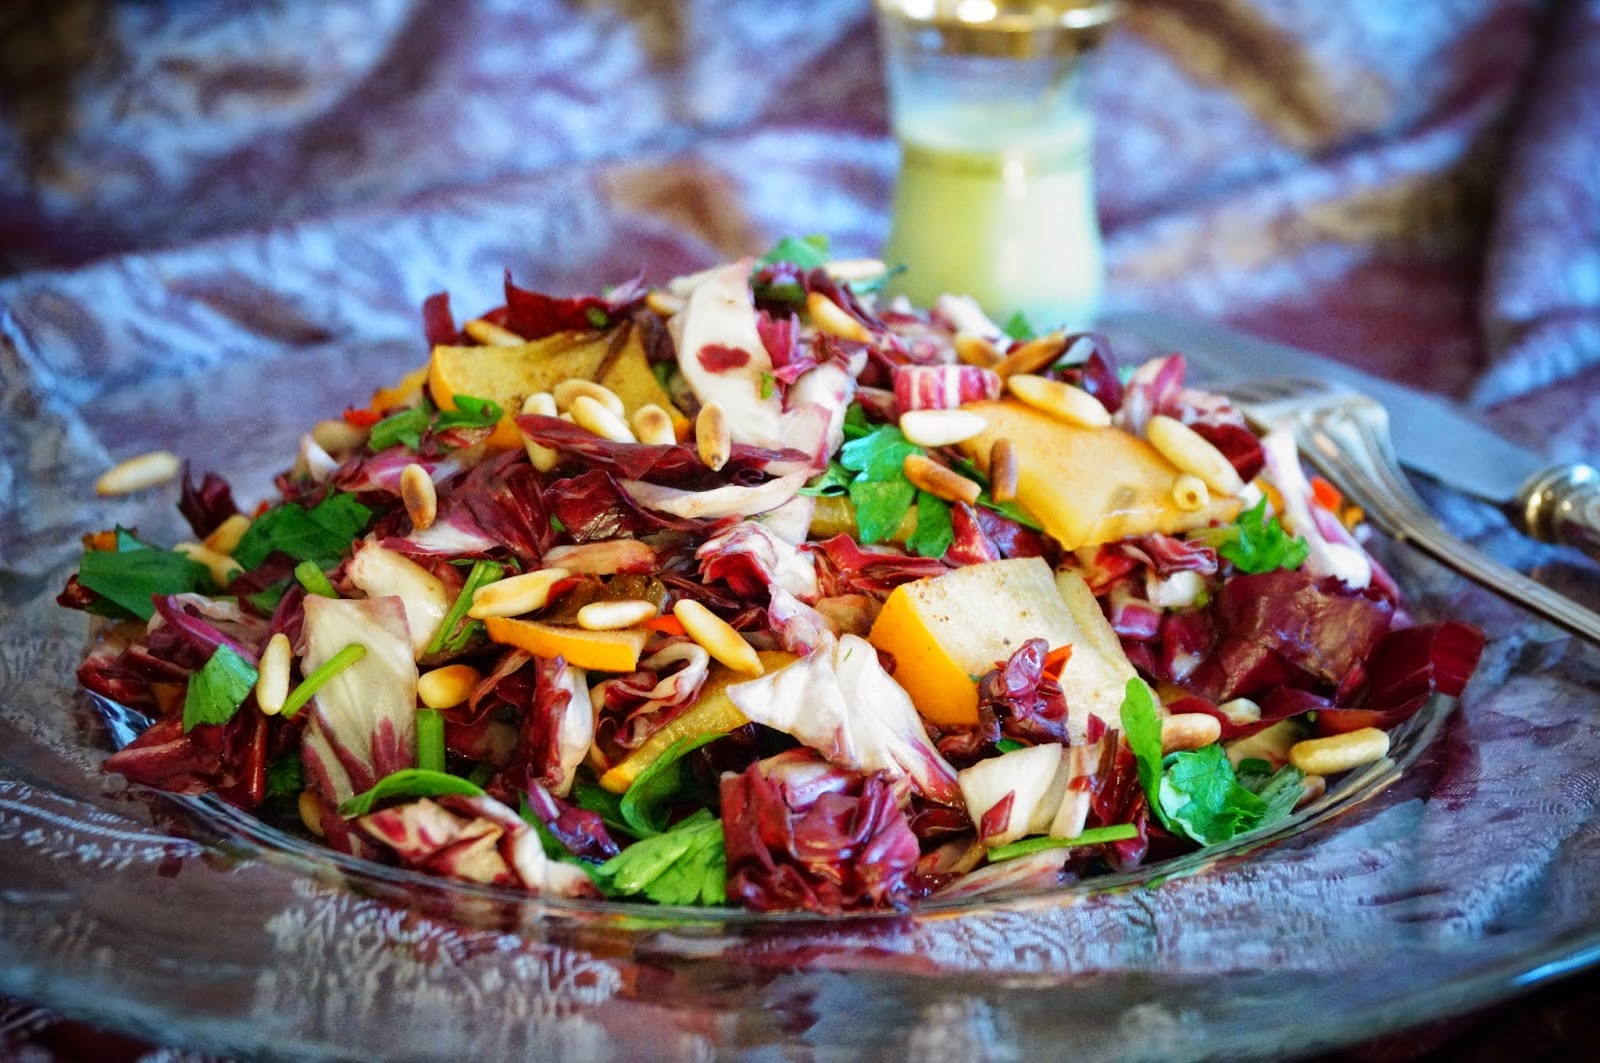
Herby radicchio kaki salad with a creamy tahini sauce

It's me again;-)

Bitter foods are essential for good health! And because I’m on a healthy diet, I try to eat more of them. For this purpose I created a salad with a pinch of bitterness from a red radicchio. This bitterness I combined with the sweetness from a kaki, the spiciness from bell peppers, the buttery taste from pine nuts, the seasoning from herbs and the creaminess of tahini.

Bitter sweet salad with tahini Sauce

Recipe for two persons
 
For the salad
1 red radicchio (about 17,6 oz (500 g))
1 kaki persimmon
0,7 oz. (20 g) pine nuts
1,4 oz. (40g) flat parsley
1 handful of basil leaves
2 tbsp. pure cane sugar
4 tbsp. lemon juice
1 bell pepper

For the tahini sauce
1,4 oz. (40 g) tahini
4 tbsp. lemon juice
60 ml water
3 pinches cinnamon
2 tbsp. parsley and basil from the salad
½ tsp. salt


Five reasons to eat bitter foods:
1. They detoxify our livers
2. They balance our taste buds
3. They reduce sugar cravings
4. They help us absorb nutrients
5. They’re packed with vitamins and minerals

Love Ida and remember cooking is our passion

Wednesday, November 5, 2014

Spaghetti squash with creamy roasted salsa

I promise you from the first bite to the last you will love your low-carb Spaghetti!. You’ll never again miss Pasta!

Spaghetti squash with creamy roasted salsa


Recipe for two hungry eater
1 spaghetti squash
6 small sweet peppers (yellow and red)
21,2 oz. (600 g) tomatoes
4 small onions
4 cloves garlic
2 red chili peppers (or less, depending on taste)
2 tsp. Olive oil
1 handful of basil
salt and pepper to taste


Cut the spaghetti squash lengthwise from stem to tail and scoop out the seeds. Afterwards peel the garlic cloves and cut them in half. Before you place the chopped garlic cloves onto the spaghetti squash take one clove and rub it together with salt and pepper on both halves. Prick the flash from the spaghetti squash several times with a fork and put it into the oven. Bake the squash at a temperature of 180 degrees Celsius until the flesh is tender. This takes about one hour. Once the pumpkin halves are finished baking  remove them from the oven and allow them to cool down until you can handle them. Now use a fork to scrape out the strands of  “spaghetti”.
Baked spaghetti squash
Now preheat the oven to 240 degrees Celsius and wash the sweet peppers. Place them together with the onions (unpeeled) into the oven for half an hour. Their peel should be black now (like shown in the picture below).
Roasted sweet peppers and onions
Let them cool down and then peel the onions and the sweet peppers with your fingers and scoop out the seeds from the sweet peppers.
Remove the garlic cloves from the spaghetti squash and chop them finely. Go ahead with the bell peppers and cut them equally into fine pieces. The tomatoes and the peeled bell peppers and onions you have to cut into large pieces.
Now heat up the olive oil in a large frying pan or in a wok. Put the tomato chunks with the chopped garlic and bell peppers into the hot oil and fry them for five minutes on a medium heat. To help the tomatoes getting tender and making a creamy sauce and preventing them from burning stir them a few times.
Tomatoes fried with garlic and bell pepper
Now add the sweet peppers, onions and the “spaghettis” and taste the dish with salt. Cook it once more for about two minutes.
Fried tomatoes now with the roasted onions and sweet peppers
Meanwhile wash the basil and chop it roughly. Take the pan from the stove and stir in the chopped basil.

Spaghetti squash with the roasted salsa


Before serving season the spaghettis with salt. And now enjoy!


Love Ida and remember cooking is our passion

Monday, November 3, 2014

Chocolaty apple almond cake with a salty caramel topping

Chocolaty apple almond cake with a salty caramel topping
This raw gluten-free and wholesome cake is sinlessly delicious! So you can take two or three pieces without regrets. And while you'll indulge in this divine food you not only do something for your soul but also for your health!


Recipe for a cake form with a diameter of 6,3 inches (16 cm)
 
For the crust
3,2 oz. (90 g) almonds
3,2 oz. (90 g) dates (pitted)
¼ tsp. salt

For the filling
10,6 oz. (300 g) cashew nuts
14,1 oz. (400 g) peeled and diced apples (sourly)
1 ½ tbsp. .lemon juice
7 tbsp. agave nectar
2,3 oz. (65 g) coconut oil
1 pinch of salt
4 ½ tbsp. raw cacao powder

For the caramel sauce
5 tbsp. agave nectar
5 tbsp. cashew butter
4 tbsp. water
2 ½ tbsp. lucuma

Furthermore:
2 apples (sourly)
1,8 oz. (50 g) almonds
coarse Himalayan salt (or sea salt)
lemon juice

For the filling soak the cashew nuts for about four hours.
For the crust throw all the crust ingredients into the food processor and process until you end up with a sticky dough.
Cover the base of the cake pan with a baking sheet and lightly grease the ring with some coconut oil. Evenly press down the almond date mixture into the cake ring.
Now blend the soaked cashew nuts together with the chopped apples, the agave nectar and the salt in your high-speed blender. Melt the coconut oil and add it to the mixture as well. Blend everything once more.(For this I use my Vitamix, - it’s rather expensive, but it ensures a really perfect texture for the filling). Now remove one third of the white filling and place it away for later use. Add cacao powder to the remaining two thirds of the white filling and blend again.
Take a dessert ring with a diameter of 2,75 inches (7 cm) and place it in the middle of the cake pan and fill it with the white cashew nut filling. Evenly spread the dark cashew nut filling outside of the dessert ring (but inside of the cake pan ;-)). Batter the cake smoothly and remove the dessert ring cautiously.
Place the cake into the freezer for five to six hours.
Mix all the ingredients for the caramel sauce together and put it into the fridge.
It’s time to peel the apples and chop them into small and equally sized pieces and put them in a bowl filled with cold water and some squeezes of lemon juice.
Thereafter chop the almonds coarsely.
Half an hour before serving remove the cake from the freezer and take it cautiously out of the cake pan.
Dry the chopped apples and spread them together with the almonds over the cake. Finally sprinkle the caramel sauce onto the cake and garnish with some Himalayan salt.


Love Ida and remember cooking is our passion
Related Posts Plugin for WordPress, Blogger...